We recently had a client ask if there was a way she could create a page that only her employees would be able to see. She was looking to add things like her employee handbook and training manuals to it and didn’t want that information to be public.
WordPress has a built in feature that allows you to password protect pages, making any pages that require a password hidden from the public. It’s very easy to password protect page. Today, we’ll show you how to do it.

Create A New Page
You’ll create a new page as you normally would, by going to Pages > Add New. Add your content, images and anything else you want on the page. Preview your changes to make sure everything looks the way you want it.
Adding A Password
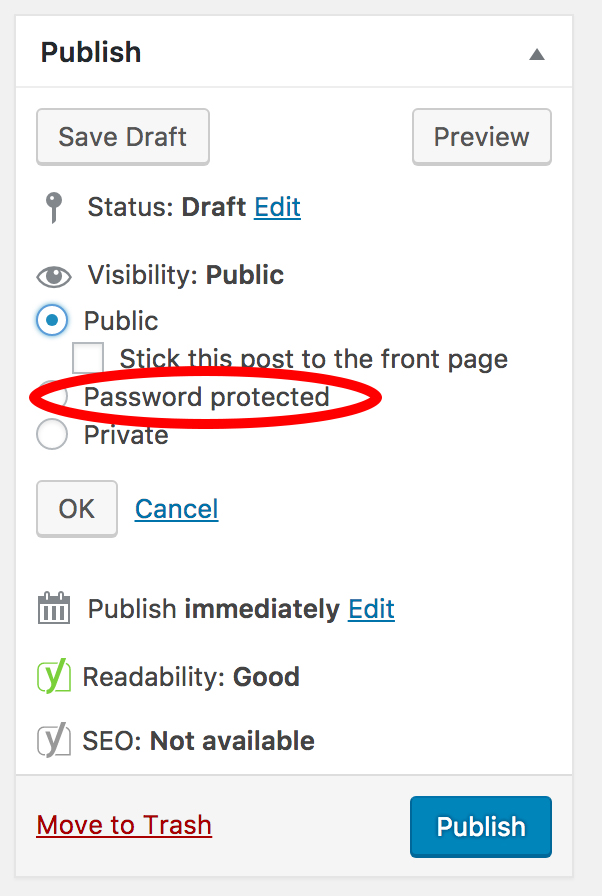
When you’re page is ready to go, before you hit publish, you will want to change the visibility settings to “Password Protected”. When you click that box, you’ll be asked to set a password for the page. You can make the password anything you want, and once you set it, go ahead and publish.

That’s it! Now, only people who have the password will be able to access the page you just created.


