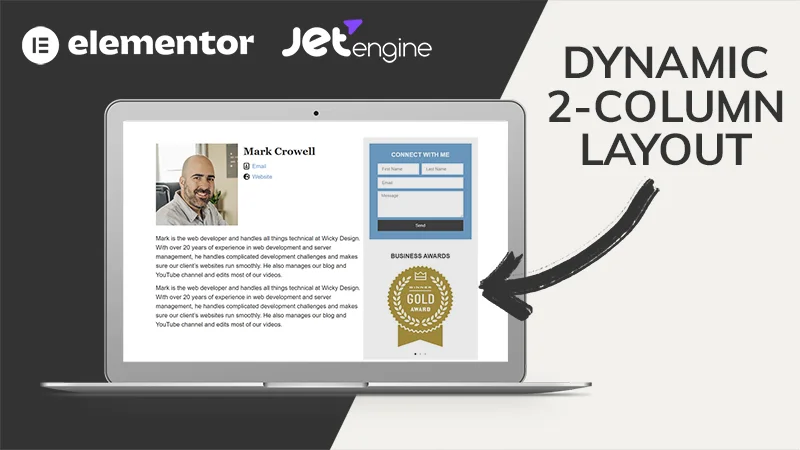
In this Elementor tutorial video Mark will show you how to make an Elementor section a clickable link. This can be done without using plugins or custom Javascript/CSS code.
Elementor (Affiliate Link):
https://wickydesign.com/get-elementor
Video Transcript
Hi, this is Mark from Wicky Design. In this Elementor tutorial, I’m going to show you how to make a whole section clickable, all built into Elementor.
Now, by default, Elementor doesn’t have this option where you can make a whole section clickable. You would think that they would, but they don’t. They do have a call to action widget, which has this functionality. So what I’m going to in this video is show you a really unique way to make a section clickable without adding any plugins, not adding any custom CSS or javascript. This is all going to be built into Elementor and this is a great way to achieve this without having to do any weird customizations.
I’m going to recommend that you have Elementor Pro to do this. You can do this functionality with the free version of Elementor, but you’re going to have to be a little more creative and it’s going to be a little more difficult. So I’m going to show you 2 ways to do this inside of Pro. So let’s jump right into it.
As you can tell, this is a simple, two-column call to action section. There’s no way that you can just add a link to the whole section. The easiest way I found out to do this is to actually convert this whole section into a template, then reinsert this template as a widget and wrap that around two HTML tags. So I’m going to show you how to do that right now.
The first thing to do is convert this to a template. So you just right click on the section and save as template. Let’s call this something like CTA. Hit save, and then what I do is close out this. You can delete the section now because what we need to do it’s best to have this as one row and then you just stack everything on top.
So let me just start with creating one row. I’ll just do this. Now the first thing we need to do is HTML. I’m just going to get it all setup, then I’ll add the code next. So the next section is the template, which is the file or the template you just created. So I’m going to drop that underneath there. And let’s pull that in. So you just type in the template file you just named. Here it is, CTA, that showed up here. And one more HTML tag right underneath it.
So before I start adding the code, what I recommend is this weird gap that you get in between your widgets, this is a setting that you can change globally or you can just change it on the row. This is what they call widget space. By default, it’s at 20px, so make that 0 because you want it to bump up here. You don’t want to have any weird gaps because it’s going to make it where it’s not clickable on the whole thing.
Okay, so now the next section is, you just click on the top HTML and it’s a simple <a href=, to wherever you want to go. Let’s add our website. So you’re going to notice that once I close this little bracket it’s going to add this </a>. You don’t want that in there. This is where the magic is. So you just want to have it open, you have the template, and now you need to close that. So now you need that to close that, so you’re going to have the open link, this template, then close it. That’s it! This is a really simple way to do it and I’ve noticed that not a lot of people have figured this out, but let’s test it out.
So now when I mouse over, it will go to Wicky Design. That’s the second that you enter your mouse in here, that’s 100% clickable to one link. So that is one way to do it. One thing I recommend is don’t have any links within the template. So for example, if you had this image linked to a different URL, what it’s going to do is, it’s going to force the user to go to that URL. So it overrides this HTML tag. So it’s best to go in, make sure your template has no links at all because you don’t want it to conflict. This is fully responsive too, so if you scale down on mobile, this will all stack correctly and be clickable.
Now, I mentioned in the beginning of the video, if you have Pro, they have a call to action widget, which can do a very similar thing. And this is all built into Elementor, so you don’t have to add that HTML code or anything like that. So to do this, you just add the widget and if you want to try and style it like the one above, you can have the image on the right, and the content, and a button.
So by default, when you add, I’ll show you right here. When you go down here and you go to content. Where you add the link here, so let’s just say we want this to go to our website again. So you can see by default, it’s the button only, so by adding that link, it just has it where that is clickable. But here is a cool little thing right here. It’s called whole box. So now they’ve made it where the whole call to action section is clickable, just like the one above, without adding any custom code. My recommendation is, if you have a call to action section, if you could just use this widget built in and try to style it that way, that’s easier and you’re not going to have to add a template file and wrap these HTML tags. This isn’t a hard way to do it, but this is easier to just use this widget if you can.
Like I said, if you have the free version of Elementor you can go in here and do the same thing, You just add these HTML wrappers around different sections or rows, but the problem a lot of times comes, you want to make sure you have everything laid out in one row. I found out this is much easier. If you had this still separated out, you would have to add an HTML wrapper around the left column, then one around the right column and it gets a little more confusing.
So this is two great options to have the whole section clickable. I hope this video has helped you out. Thank you for watching this Elementor tutorial. If you’d like to receive future videos like this, make sure you subscribe to our YouTube channel and hit the notification bell. Thank you and have a great day!


